Transcoding video for a full screen website background
A simple how-to with Handbrake and Quicktime

A simple how-to with Handbrake and Quicktime

We love how full screen background video brings life to a website. It’s a great spot for your showreel, which would otherwise just end up on Vimeo or YouTube. But what’s the best way to reduce the size of your high-end footage?
For our “coming-soon” site we shot a short clip that we displayed fullscreen on our website. Here’s how you can do the same.
"But I’m not a programmer…"

There’s no HTML or JavaScript in this tutorial. It’s about transcoding: getting the most out your footage, for the least MB’s possible.

If you need a simple (free) solution for your website, Stefan Erickson created just the thing: Covervid.
Apps you need
Many transcoding tools are based on the FFmpeg library. They’re often quite daunting, littered as they are with options and parameters. That’s why we picked Handbrake. You can use MPEGStreamclip too, but that hasn’t been updated in four years. Additionally, we used Quicktime 7 Pro.
Looped
You don’t want to burden the visitors of your website with a huge download, so loops work well. We opted for a 46 second loop, with little movement in the shot.
Our friend Ties Versteegh, DOP, shot and edited our video using a neat trick: he put the clip on the timeline twice, back to back. Now you can vary the in & out points, to create a perfect loop.

We shot our video on a RED and edited the .r3d native in Adobe Premiere. The export was a huge 1.3 GB 2K ProRes 422 HQ, which we had to reduce to 5 MB or less. Preferably without noticeable loss.
We wanted to feature the video in our press kit and on Vimeo, so we created a 1920x1080 version first. Full HD for a website background is a bit overkill, so we needed a version scaled down to 1280x720.
Transcoding
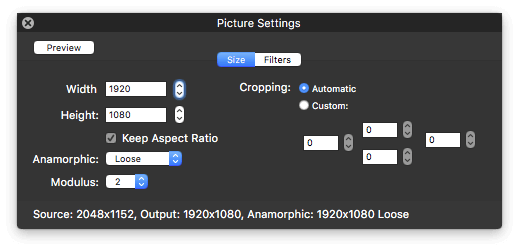
Unfortunately you can’t export Handbrake presets, but you can save them. So, setting up Handbrake is a matter of adjusting the default settings:

- Set video codec to H.264
- Set framerate to constant
- Quality should be constant, with the slider at 20
- Set the preset to veryslow
- Set tune to film
- Use the high profile
- In the Picture Settings menu, set the resolution to 1920x1080
Quality Slider
Sliding all the way to the right (to zero) equals lossless encoding. Twenty seems to be a good ball park setting. Depending on your footage, anything lower than 20 will probably result in visible artifacts.
Tweak the quality slider if you need a smaller file. We brought our 1.3 GB file down to 13 MB —if you’re comfortable with bit rates: that’s from 219 mbit/s to ~2 mbit/s.
Done? Hit Start, sit back, relax and enjoy a cocktail: this might take a while.
Congratulations, you just made a H.264 Full HD export of your video, ready for Vimeo. Now we need a scaled down version for the website.
For some reason we didn’t get this to work in Handbrake without creating unwanted artifacts. Emmanuel Jarri came up with the solution:
I had the artefacts problems, with blinking lines and “white pixels”. It took me a while but the solution that worked for me is this:Detelecine = “Off”
Deinterlace = “Off”
Interlace Detection = “Off”
Additionally, you can try to use
Denoise = NLMeans ; Strong ; Film
to smooth the whole thing. It solved my artefacts problems. Hope this helps!
It sure does 🙌
720p H.264 with Quicktime Pro
Before Emanuel’s fix, we used Quicktime Pro for rescaling. Here’s how:
Open the movie and select Export from the File menu.
- Export to Movie to MPEG-4
Under Options, check that:
- Image Size is 1280x720
- Frame Rate is current
- Optimized for Streaming
Under Video Options, check that:
- Profile is set to Main
- Encoding mode is set to Best Quality (Multi-pass)
- Data Rate: 500 kbit/s
Check the summary to see what file size you’ll end up with, and adjust the data rate accordingly. We aimed for a 3 MB file size.
Hit Save and you’re all done!
A note on bit rates
Vimeo recommends a bit rate of at least 10 mbit/s for full HD. Using variable bit rate with that setting resulted in a file of 58 MB. We couldn’t find a difference in quality ourselves when doing a frame by frame comparison:
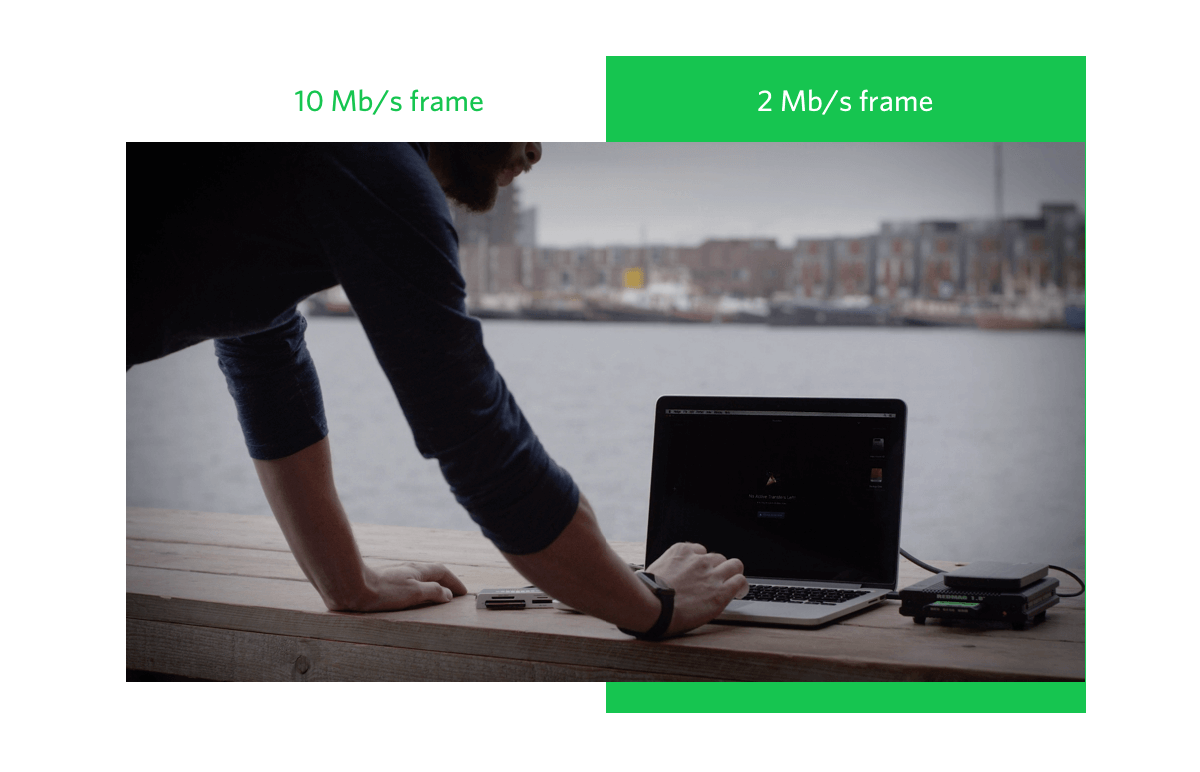
We recommend you use Handbrake’s quality slider, and maybe create one or two smaller and bigger versions just to check if the quality differs a lot. It’s not an exact science.
Do you work with video regularly? Check out Hedge, not just the fastest but also the easiest way to back up your media.